Visar inlägg med etikett tutorial. Visa alla inlägg

torsdag 8 november 2018

Rusty Heart Canvas -videotutorial

Hi!
Time to share a videotutorial on rusty canvas.
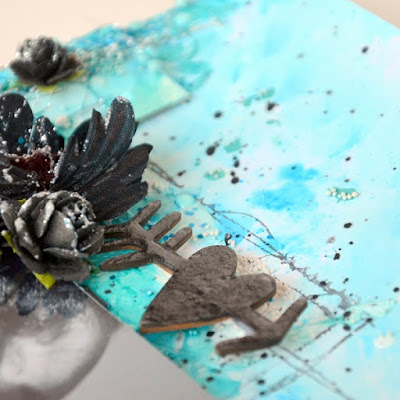
Have to wooden hearts on my canvas. The hearts come from a Swedish shop, Pysselskafferiet.
 I have used lot of mixedmedia supplies and mediums. All my  mixedmedia mediums and colors come from Prima- Finnabair.


Here you find my videotutorial- You are so welcome to watch.


xoxo Katja

måndag 6 februari 2017

2crafty Chipboard -Mixed Media Journal- Videotutorial

Hi!
Have made a videotutorial for 2crafty chipboard. Its artjournal page on black bookpages.
Love the balck against the colors.

Check it out and let me know what you think.

torsdag 7 juli 2016

Layout with Rainbow Color and stamps from 49 and Market- videotutorial

Here come a new mixedmedia layout.

Lot of different mediums. I have used mist and Rainbow color from 13arts.

Artstones and glitter.


Check out my video, and you can see my tutorial,


Hugs Katja/Mezzanotte

lördag 18 juni 2016

Mixed Media album on YouTube

Hello everyone!
Now I have made my first YouTube clip.
I show you how I do a Mixed Media album with many products of my new favorites of 13arts.
I also use product from Prima- Finnabair product.


Its a album with lof of glitter. You know that I looooove glitter.


So please be gentle- I have much more to learn -How to make a good tutorial on film.
But I had great fun so I will do more films.

https://youtu.be/FE1JuXKqDRg


Hugs Katja/Mezzanotte


onsdag 30 september 2015

Deco Foil- Transfer Adhesive

Att använda Deco Foil-Transfer Adhesive har stora utvecklingsmöjligheter till många olika slags projekt.

Du behöver Transfer Adhesive och Foil i valfria färger och givetvis ett projekt. Det går att använda på olika underlag som papper, tyg, metall och trä.
***
You can use Deco Foil Transfer Adhesive on many different kinds of projects.

You need Transfer Adhesive and Foil in different colors and of course a project. It can be used on different surfaces such as paper, fabric, metal and wood.


Jag ritar mitt motiv med Adhesive. Låter det torka tills det är helt klart. Ca 7-10 min, kan det ta, men det beror på hur tjock lager du lägger på. Så gör ett prov vid sidan om ditt projekt som du kan prova på.
***
I draw my design with Adhesive. Let it dry until it is completely clear. About 7-10 minutes,  but it depends on how thick the layer you put on. So do a test at the side of your project that you can try on.


När det torkat, så lägger jag på foilen med färgsidan uppåt. Gnuggar ordentligt.
***
When it dried, I put on the foil with color side up.  I rub properly.


Drar loss folien.
***
Pull off the foil.


Ditt motiv är klart!
***
Your design is ready.


Det har blivit ett enkelt kort med denna teknik.
***

Made a card with this technique.


 Du kan även använda Adhesiven på andra projekt. Här jag gnuggat på lite slarvigt först med silver foil och sedan med guld.
***
You can also use adhesives on other projects. Here I rubbed little sloppy, first silver foil and then with gold.


Läcker effekt!
***'
I really like the effect!


Tack för titten!/Thanks for stopping by.

Material/List of Supplies:
Craft Deco Foil Transfer Adhesive 61 ml TW4822
iCraft Deco Foil Transfer Sheets Silver TW5101.5
iCraft Deco Foil Transfer Sheets Gold TW5102.5
iCraft Deco Foil Transfer Sheets Purple TW5111.5
Prima Statement Stickers - The Archivist 990282
Martha Stewart Craft Paper Trimmer M281055
Bazzill Mono Vanilla T8-808
Bazzil Gold Foil T12-1227 


onsdag 8 juli 2015

Tutorial- How to make a minialbum from a cardstock. Meander Book

Idag bjuder jag på en beskrivning på hur du kan vika ett eget minialbum från ett helt cardstock eller mönstrat papper. Albumet blir 3x3 inch.

Du behöver:
    *  Ett ark 12×12-tumspapper.
    *  Kartongbit att göra utsidorna av och ett par bitar mönstrat
       papper att klä in utsidorna med.
    *  Lim och eller dubbelhäftande tejp.
    *  Sax eller skärmaskin
     *Scoringboard och en falskniv.

Börja med att biga på 3, 6, och 9 inch. Vrid sedan på pappret ett halvt varv så och biga på samma mått så får du 16 rutor.

***

Today I have a tutorial on how you can fold your own minialbum /Meander Book from a cardstock or a patterned paper. The finished album will be 3x3 inch.
You need:
* One 12×12-inch sheet of cardstock
* Chipboard and patterned paper to cover the alb
* Paper cutter or scissors
* Glue and or Adhesive
* Paper-scoring board and bone folder

Start with to score 3 inch, 6 inch and after that 9 inch. Turn the cardsock and score at the same inches at the vertical side. You will have 16 squares.


Du börjar med att klippa med mittenvikningen, fram till sista rutan. Sedan vänder du på papperet ett halvt varv och klipper fram till sista rutan längs den yttre vikningen på vardera sida om mittenvikningen.
När du klippt ska papperet se ut som ett stort "M".
***

On the first vertical score at 3 inches, cut from the bottom all the way down to the 9-inch horizontal score line.
On the second vertical score at 6 inches, cut from the top all the way up to the 3-inch horizontal score line.
On the third vertical score at 9 inches, cut from the bottom all the way down to the 9-inch horizontal score line.
If you pick up your paper in the top two2 corners and pull slightly away from each other, it will look like you see a large “M”.


Nu ska vi vika albumsidorna. Börja vika på raden på den vänstra sidan. Vik varannan gång åt vardera håll. Fortsätt så och på botten vänder du och fortsätter vika tills du fått det 3x3 album.
***
Now we will fold the pages.
Beginning at the top left side, fold the first square down toward you “on top” of the square below it, and crease the fold.
Continue folding this row “accordion style” until you reach the bottom, creasing the folds as you go. At the bottom, fold it underneath the second row and continue on up this row, accordion-style, to the top, folding the top square underneath the third row, folding this third row same as the first row, and finishing the fourth row the same as the second row. You should now have a neat, tidy 3×3-inch stack of pages.


Om du ställer upp dina sidor så ser du som en "vinge" på din första och sista sida. På dessa kommer du att fästa din kartongsidor. 
Nu ska du limma dina albumsidor. Du kan lämna öppet på toppen och på sidan. Här gör du som du vill.
***
If you stand up your pages, you will see a “wing” as your first and last page. These will be used to attach the pocket pages to the cover. The first fold is on the side with a top opening. Glue/tape the bottom together to form your first pocket (top-loading pocket).Place tape to the back fold section to help hold the binding together.


Skär till kartong, går bra att göra i samma storlek 3x3 inch. Jag har gjort mina lite större.
***
Cut out cardboard. You can make them in the size 3x3 inch, I have made mine litte bit bigger.


Klä in kartongerna i valfritt papper och limma fast. Jag klipper av hörnen så de blir lättare att vika in.
***
I use patterned paper and glued on the carboard. I cut of the corners so it make them easier to fold.

Limma fast kartongsidorna på albumets första och sista sida. Klä in insidorna med mönstrat papper och dekorera valfritt.
***
Glue the cardboardpages on the first and the last page on your album. Cover the inside with paper and you can decorate how you want.


Klä ryggen med en remsa papper. Nu är din grund färdig .Dekorera dina albumsidor på valfritt sätt.
***
Take some paper and glue on the back. Now is your album base finish. Decorate your albumpages on your own way.

Tack för titten/ Thanks for stopping by.

Material/List of Supplies:
Martha Stewart Craft Scissor All Purpose M281015
Martha Stewart Craft Paper Trimmer
Martha Stewart Craft Bone Folder M281018
Martha Stewart Craft  Scoring Board 42-05002
Martha Stewart Craft Punch Around the Page - Crochet Loop 42-60095
EK Glue Pen 2Way Jumbo 55-00011

Våra återförsäljare / Our retailers


onsdag 27 maj 2015

Quick Release Die Paper

Har du dåliga erfarenheter från att stansa ut med detaljrika dies? Nu äntligen finns det ett papper som hjälper dig vid utstansandet. Quick Release paper gör att cardstock lossnar utan minsta problem.
***
Do you have bad experiences from punching out the detailed dies? Now finally there is a paper that will help you. Quick Release paper allows cardstock detachment without the slightest problem.


Ta  en die, lite Release Paper och cardstock och veva dessa i din BigShot.
***
Take a die, some Release Paper and Cardstock and use your BigShot.

Se hur fint det lossnar. Det är helt magiskt hur enkelt det är.
***
See how nice it loosens. It's like magic how easy it is.


Jag tycker att Release paper spill var så fina så dessa har jag skapat en bakgrund med. Penslade helt enkelt på Soft Matte Gel och la på Release Paper. Penslade på ett lager igen och lät det torka.
***
I think the Release paper waste was so lovely. So I have created a background with them. Penciled some Soft Matte Gel and put on Release Paper. Penciled on again and let it dry.


Fick på ett enkelt sätt en personlig bakgrund på min layout.
***
So easy to make your own personal bakground.


Tack för titten/ Thanks for stopping by.

Materiallista/List of Supplies:
Couture Creations Quick Release Die Paper Twin Pack CO723818 
Couture Creations Background Savvy-Evergreen CO724096 
Couture Creations Everyday Dies-Floating Leaves CO724110 
Prima Color Bloom - Deep Teal 580322 
Prima Art Basics - Soft Matte Gel 250 ml 961428
Prima Art Ingredients Micro Beads Gold POLLEN 962609
Bazzill Mono Vanilla T8-808 
Adhesive Value Pack 01697-30
Sizzix Accessory Magnetic Platform for Wafer-Thin Dies 656499
Sizzix Big Shot Machine Only (White & Gray) 660200
Spellbinder Tool n One T-001 


torsdag 30 april 2015

Metail Foil on Laserprints

På Internet kan man hitta mycket freebies och motiv som du kan skriva ut på din skrivare. Den här beskrivningen fungerar endast om du har en laserskrivare och det som är utskrivet i svart med svart toner.
***
On the Internet you can find a lot of freebies and motives that you can print on your printer. This description will only work if you have a laser printer and that which is printed in black with black toner.


Ta valfri folie med den vita sidan nedåt och placera det ovanpå din utskrift.
Placera det in i smörpappret och kör all genom din laminat 
maskin. Det går även bra att stryka fast folien.
***
Use the foil with the white side down and place it on top of your print..
Put it into the bakingpaper and run all through your laminatemachine. It is also to iron on the foil,


Gnugga på lite lätt på folien och låt svalna ordentligt innan du lyfter på folien.
***
Rub lightly on the foil and let it cool before lifting up the foil.


Resultatet blir platt och sitter verkligen fast. Mycket snyggt.
***
The result is flat and sits really solid. Very neat.


Tack för titten!/Thanks for stopping bye.

Material/List of Supplies:
iCraft Deco Foil Transfer Sheets Magenta (satin) TW5206.5 

                                                      Våra återförsäljare / Our retailers


onsdag 29 april 2015

Deco Foil on Fabric- Tutorial

För ett par dagar sedan visade Jeanette/ Tettiz en tutorial på Deco Foil med Foam Adhesive. Kika på hennes inlägg HÄR!

Jag kommer nu att visa hur du kan använda Deco Foil på tyg. Jag har använt den på en lite grövre bomullstwill. 

Steg1:
Stansat ut stjärnor och bokstäver i  Iron on Transfer Adhesive. Alfabetet är utstansat med limmet uppåt för att hamna rättvänt på tyget.
***
A few days ago Jeanette/Tettiz showed you a tutorial on Deco Foil with Foam Adhesive. Check out her tutorial here.

I will now show you how you can use the Deco Foil on fabric. I have used it on a little thicker cotton twill.

Step1:
 Punched out stars and letters of Iron on Transfer Adhesive. The alphabet is pounched with the adhesive up to end up being right-side of the fabric.


Steg 2:
Jag placerar ut mina motiv på tyget.
***
Step 2:
I place my designs on the fabric.


Steg 3:
Använd "smörpappret" som ligger i förpackningen stryk nu på motivet. Stryk på medelvärme max 150 grader.
***
Step 3:
Use the "bakingpaper" in the packaging and iron now on the design.  Iron on with the heat 150 degrees.


Steg 5:
Låt det svalna i ca en minut och pilla sedan bort skyddspappret. Då ser du som en plastig hinna som sitter kvar på tyget.
***
Step5;
Let it cool for about a minute and then peel off  the bakingpaper. Then you will see that a plastic film that remains on the fabric.


Steg 6:
Lägg sedan på foilen med den vita sidan ner. Färgen du vill ha på motivet ska vara uppåt. Använd samma smörpapper som tidigare när du stryker.
***
Step 6:
Then put on the foil with the white side down. The color you want on the subject should be facing up. Use the same bakingpaper as before while ironing.


Steg 7:
Låt det svalna ordentligt innan du lyfter på foilen från tyget.
***
Step 7:
Allow to cool thoroughly before lifting the foil from the fabric.


Jag har gjort likadant på en liten bit bomullsväv. I ställer för att stryka körde jag tygbiten genom laminatorn. Resultatet blev otroligt jämt och fint.
***
I have done the same on a small piece of cotton fabric. In instead of ironing I ran the cloth through the laminator. The result was incredibly nice.


Så nu fick jag en personlig shoppingväska med guld och silver i Deco Foil.
***
So now I got a personal shopping bag with gold and silver in Deco Foil.


Ni kikar väl in lite senare idag då visar jag er hur man kan använda folien tillsammans med sin laserskrivare. 

Tack för titten!
***
Come back litte later today when I  will show you how to use the foil along with laser printers.

Thanks for stopping by!


Material/ List of Supplies:
iCraft Deco Foil Transfer Sheets Silver TW5101.5 
iCraft Deco Foil Transfer Sheets Gold TW5102.5 
iCraft Deco Foil Iron on Transfer Adhesive TW3370 
Sizzix Bigz XL Die Word Play by Tim Holtz 657837 
Sizzix Bigz Die - Stacked Stars 658771 

                                                 Våra återförsäljare / Our retailers